tracking

Sunday, July 12, 2009

Go Green By Buying Second Hand

One of the easiest and least expensive ways to go green is to buy second hand. This not only keeps discarded, but usable, items out of landfills, it conserves the resources needed to make and transport new items. Second hand items are usually offered at deeply discounted from their original prices. Try purchasing at least some of the items you need and use second hand.

Thrift Stores:
Offer a variety of clothing and household items at deeply discounted prices. It is unusual to find an item over $10. Most price points are $6 or less. I have found a variety of valuable, vintage, and antique items at thrift stores in the past. I also regularly find name brand clothing in current styles. In the Salt Lake City area, try these stores: Deseret Industries, Savers, Thrift Town, and Salvation Army.

For Teen Fashion: For the more discriminating teen tastes, try stores that specialize in current teen fashion. I have found that these stores accept items that have been in the mall within the last two years. The prefer items that are less then a year old. You are sure to find something to suit your teen at these locations: Pib's Exchange, Plato's Closet, and
Fashion Addiction. Also, these shops will buy items that your teen has outgrown or will no longer wear and exchange them for cash or store credit.

For Women's and Men's Name Brand and Designer Fashion: For higher price point items, try Name Droppers.

For Furniture and Home Decor: The Finer Consigner features gently used furniture and home decor in all styles. They offer some great buys.

Also, be sure to donate, consign, or sell your discarded useable items. Someone else out there will probably want them.

Friday, July 10, 2009

My Eco Pet Pevee

Now that we are in the middle of the summer and the temperatures are soaring into the 90's, I want to be able to wear my summer fashions without needing to find a coordinating sweater and jacket. But, when I go to stores, restaurants, and other public places, the air conditioning is turned up so high that I can't be comfortable without one. That is not the mention the inconvenience of needing to tote along a jacket or sweater when it is 90 degrees. Is it really necessary to use all that excess energy to freeze your customers?

Thursday, July 9, 2009

Advanced Electricity Savings


Alright, so you have changed your light bulbs, you turn off your lights and unplug your appliances when you are not using them, and you purchase energy star appliances. But, you still want to save more electricity. Here are some additional energy saving tips that can help you stash your bill and environmental impact even further.

In The Kitchen:

Refrigerator: Your refrigerator likely uses the most electricity of any appliance in your home. But, there are many things you can do to help your refrigerator run more efficiently.
-Set your temperature control to 36 to 40 degrees.
- Keep your refrigerator full. A full fridge uses less energy because new items placed in the fridge are also cooled by surrounding items. If you don't have enough food and beverages to fill the fridge, place bottles of water in to fill up the space. The same goes for the freezer. If you can't fill it with food, keep it filled with ice cubes.
-Unthaw frozen foods in the fridge. The escaping cold will help cool the refrigerator.
- Let hot items cool to room temperature before placing in the fridge.
- If you have a freezer that requires defrosting, do so regularly.
- Keep the coils on your fridge clean. Pull out the fridge and dust them regularly.
- Keep food and beverages covered in the refrigerator.
-Don't open the door more than is necessary. Close it right away.
-Place your refrigerator out of direct sunlight and away from heat sources like stoves and heat registers. Also, place your fridge along an external wall so the heat it generates can easily disapate.
-Make sure the gasket (rubber edging on your door) on your fridge is in good shape. If it is coming off, reattach it.
-Make sure the door is tightly closed.

Stove:
- Chose a burner that correlates to the size of the pan you are using. This prevents excess heat from escaping or from using excess electricity;
-When boiling water, draw the hottest tap water. Your water heater has already used energy to heat it, why use more?
-Turn on the burner when you are about to use it. There is no need to preheat a burner.
-You can usually turn your burner down or off a few minutes before your food is done cooking. The retained heat will finish the cooking process.
- Use the microwave or crock pot instead of the stove whenever possible.

Oven:
-Unless you are baking bread or pastries, you don't need to preheat your oven. Turn on the oven as you are placing your food in.
- When you are baking, try to bake more then one item at a time. Plan meals for maximum oven usage.
- Don't open the door to the oven while you are baking.
- You can usually switch off your oven a few minutes before your items are done baking.
- When it is cold outside, open the oven door after baking to let the heat escape and help heat the house.
-Use glass or ceramic pans when baking. They retain heat better then metal ones and allow you to lower your baking temperature by 25 degrees or shorten your baking time.
- Use the microwave or crock pot instead of the oven whenever possible.
-Build a solar oven. They can be used year round as long as the sun is out and can reach temperatures of up to 400 degrees.

Small Appliances:
- Do as much chopping and mixing as possible by hand instead of using food processors and hand mixers. Just about anything that is whipped or mixed by a hand mixer can be done on with an eggbeater. Eggbeaters usually cost less then the hand mixer anyway. Also chop your vegetables and fruit by hand.
- Don't use an electric bread knife. Anything and electric knife can cut, you can cut with a regular knife.
-Don't use an electric can opener. Cans can be opened easily with a hand held can opener which generally cost less then an electric one.

Dishwasher:
- Make sure you only wash when you have a full load of dishes.

Laundry Room:
Washing Machine:
- Wash your clothes using cold water. Many eco-friendly laundry detergents are formulated to work well in cold water.
- Always run your washer with a full load of laundry.
- Don't wash clean clothes. Make sure you get a maximum number of wearings out of your clothes before washing. As a general guideline, consider the following:
Jeans and Pants - wear 5 times before washing
Shirts- wear twice before washing
Underwear and Socks - wear once before washing
Jackets and Heavy Sweaters - wear 10 times or more before washing
Light Sweaters and Sweats - wear 3-4 times before washing
Towels - use 5 or more times before washing
Sheets - use for a month before washing
Tablecloths and cloth napkins - use for a week before washing
Dishtowels - Use twice to dry dishes or for a week to dry hands before washing

Clothes Dryer:
- Whenever possible, dry your clothes on a clothesline. Drying clothes outside on the line makes them smell great. I have found that on hot days, putting my clothes on the line actually dries them faster then putting them in the drier. Clothes that get stiff with line drying can be put in the dryer on air fluff for 5-10 minutes to restore their softness.
-When using the dryer, make sure the lint trap is cleaned with each use. A clean lint trap will allow your clothes dryer to operate more efficiently.
- Avoid overloading your dryer. You will only use more energy to get your clothes dry.
- Leave some dry items in the dryer from one load to the next. This will help your clothes dry faster.
- If you have a few items that are not completely dry, run them with the next load or hang them to dry instead of letting the entire load run until everything is dry.

Lighting:

- If you haven't changed your light bulbs to compact florescent bulbs (CFL), do so. They will immediately save 70% of the energy used to light your room. Although they cost more then traditional light bulbs, they pay for themselves many times over in energy savings. Also, there are a variety of shapes and sizes available if you don't like the look of the swirly bulbs.
-If you can not afford to replace all of your light bulbs with CFLs, start with the rooms in your home where you have the lights on the most often: Kitchen, living room, family or TV room, bedroom, bathroom. Finish with the areas where the lights are switched on for only a short amount of time like hallways and closets.
- Turn off the lights when you are watching TV or doing computer work that does not require to you look away from the computer screen.
-During the daytime, open drapes and blinds to use natural light instead of turning on the lights (unless your are letting in excess heat in the summer time).
-Install skylights where it is feasible.

Heating:
-Set your thermostat no higher then 68 degrees and wear a sweater or jacket.
-Avoid opening windows and minimize opening doors.
-Close registers in rooms you are not using. You don't have to heat those to.
-If possible, turn down the thermostat in bedrooms.
-Turn the heat down or off during the night and when you are away from home.

Cooling: Air conditioning accounts for a substantial amount of home electricity use.
-Set the thermostat to 78 degrees in the summer and wear your light summer clothing. Is there really a need to wear a sweater in the house when it is 100 degrees outside?
-During the summer, open windows and doors at night to fill the house with cool air and close them before sunrise. This will trap the cool air in the house and keep the house cooler during the day. My family has done this for years and has hardly needed to use the air conditioner this summer. We sometimes need to turn on the air conditioner in the late afternoon while our neighbors have their air conditioners running all day.
-Close drapes and blinds on windows that receive direct sunlight in order to avoid letting excess heat in.
-Use fans and ceiling fans to keep you cool.
-Avoid opening windows and minimize opening doors while you have your air conditioner running. You don't have to pay to cool the outside.
-If you have central air, close the registers in rooms you are not using.
-Avoid using the oven during the hottest months of the year. When you do, allow the oven to cool with the door closed.

Bathroom:

- Learn to style your hair without the aid of a blow dryer, curling iron, or other small appliances. Talk to your hairstylist about styles and products that will allow you to air dry and go.

Computer:

- Turn it off when you are not using it.
- Set your computer to go to sleep or standby when it is not being used.

Yard and Garden:

- Use solar yard and garden lights. I have found that these lights are almost always less expensive then conventional lights and have the added bonus of using solar energy. Plus, you don't have the hassle and expense of wiring in the light. That way, the lights can be moved at will.
-Decorate with tin can luminaries and use candles instead of electricity.
-Trim hedges, trees and bushes by hand instead of using electric hedge trimmers.
-Rake leaves and grass clippings by hand instead of using a leaf blower. Not only will you save electricity, you will get a bonus calorie burn.
-Don't use patio heaters. They use as much electricity as space heaters and refrigerators while all of the heat escapes into the outdoors. Instead wear a sweater or jacket.

Home Composting


Home composting is one of the easiest and cheapest ways to go green and produce valuable fertilizer for your garden. Composting is taking plant material in the form of kitchen and yard scraps and decomposing it into fertile soil for your garden. It is beneficial to the environment because it keeps plant material out of the landfills and reduces the methane (a greenhouse gas) produced by landfills while producing nontoxic fertilizer.

Compost Containers: You have probably seen the compost tumblers and other bins that are commercially available and usually cost several hundred dollars. The truth is that you don't need one. In fact, you don't need a container at all. All you need is a corner of your yard were you can form a pile and a pitchfork or shovel to stir it up with. If you don't have a yard, or you prefer to have your compost in a container, you can make a cheap container using old garbage cans. These can be stored inside, outside, or in a garage. When composting is done correctly, it will not smell.

What to put on your compost pile: Leaves, grass clippings, fruit and vegetable trimmings and peels, fruits and vegetables that have gone bad, egg shells, dead house plants, dropped leaves or flowers from house plants, coffee grounds, tea bags, saw dust, weeds(without seed heads), fire place ashes, manure, water, leftover coffee and tea, fruit juice that has gone bad, biocompostable paper and plastic goods.

You should avoid using: Anything containing meat or dairy, dead animals, human waste, animal waste (except for manure), yard clippings containing thorns, tree or bush branches (unless you have a chipper that can chip them fine).

What your compost pile needs: I have read in various compost books that a compost pile needs to be a minimum of three feet by three feet and comprised of a 50/50 mixture of green and brown material. The compost books also advise that a compost pile needs to be built all at once and if you don't have enough material to build the pile, then you shouldn't bother. I have found, through my personal experience with home composting, that none of the above is true. You can toss your kitchen and yard waste onto the pile as you accumulate them and they will compost just fine. There are, however, two things that your compost pile will need: oxygen and water. Without these, your compost will either dry out or turn putrid. Either way, it won't break down.

In order to keep your compost pile hydrated, and save water, you should strive to pour liquids on your pile that would otherwise go down the drain. Try using water that has been sitting in the bottom of a water bottle or pitcher to long, leftover tea or coffee, water used to boil vegetables, fruit juice that has gone bad, rainwater, etc. Also, when you run the tap waiting for the water to heat or cool, you can place a pitcher under the tap and capture the water for use on your compost.

To make sure your compost has sufficient oxygen, make sure to thoroughly turn over your pile once a week. If you turn it over more often, you will keep your compost from properly heating. If you turn it over less often, the pile will start producing methane and other undesirable gases.

Compost Heat: If your compost pile is properly decomposing, it will produce heat. Don't be alarmed when you notice this. It is a good thing.

When Compost is Done: Once you have accumulated a sizable compost pile, stop adding new material to allow it to decompose. Start a new pile for the rest of your scraps. Eventually your compost pile will lose heat. That is okay. Your compost is done and ready for use in the garden when it looks like rich, dark garden soil and the original contents are mostly indistinguishable. Below is a photo of one of my compost piles that is almost done.


Insects: Your compost pile will probably attract some insects and possibly rodents. Some insects are beneficial to your pile and should not concern you. If you build a pile on the ground, it will eventually fill with worms. Worms are beneficial because they will accelerate the decomposition and their castings are excellent fertilizer. You may also notice some ants, flies and other insects attracted by the decomposition. If the pile is properly tended, there won't be many of them. There may also be a few mice and other small rodents attracted to your pile. A few mice sampling usually is not a problem. However, if rodents become a problem, you may need to move your pile into a bin.

Saturday, June 13, 2009

Denim Recycling


What do you do with jeans that are too worn to wear? Faced with a couple pairs of jeans that were unwearable, but unwilling to just throw them away, I created a few fun new items. First, I used the top of a pair of my jeans, paired with a broken leather belt, to make a hobo style handbag for myself. I cut off the jeans just above the leg and sewed the bottom closed. I then cut off the bottom hem of the jeans and sewed them together to create a drawstring. I gathered the sides to shape the bag and added my belt that the buckle had broken off of for a strap. The front and back pockets have come in handy for my cell phone, car keys, and lipsticks.


I then used fabric from the leg of my jeans to create a handbag for my 12-year-old niece for her birthday. I selected a strait piece of fabric from the leg of my jeans and stitched the bottom closed. I then stitched around the top opening of the bag leaving room for a frayed edge. I then added the cute Fleur-de-lis iron-on that I had on hand and sewed in a section from a broken belt for a shoulder strap.


I also created a small play purse for my five-year-old niece for her birthday. Wanting something little girly, I selected a smaller segment of fabric from the leg of my jeans. I stitched the bottom closed and hemmed around the top of the bag. I then used a section from the inseam from my jeans to create a strap for the bag. I selected a cute red vintage button and used a fabric scrap to create a button a loop closure. I then hot-glued on a silk flower and leaf as decoration.

Still having a lot of fabric still available from my jeans, I created a book cover for an old poetry book using denim from the leg of my jeans and an old button.


Using the leg from a second pair of jeans, I created a wine bottle gift bag. I cut of the bottom of a leg from the jeans and stitched the top closed. I them folded over a cuff from the bottom of the jeans and had a great gift bag.


I still have a considerable amount for material left over from my old pairs of jeans. So, there will be more fun craft projects to come.


Sunday, June 7, 2009

Green your Kitty


Cats are notorious for snubbing the toys you purchase for them and finding something else to play with. Why not make your cat's toys from items around the house that would otherwise be thrown away? For awhile, my cat's favorite toy was tin foil balls made from candy wrappers. She would bat them around for hours. She isn't really into that anymore, but, I don't think she will ever get over her stretchy string. Her stretchy string is made from metallic elastic ribbon like these that we received on a Christmas gift years ago.

Since cats are rather fickle by nature, you will likely need to try out a lot of ideas to find toys your cat will like. Try some of these:

1. Many cats prefer milk lids or the pull tabs off of milk lids to play with. You could also try other types of lids like soda bottle lids or bottle caps.

2. Draw strings from old clothing or old shoe laces make good cat toys. If your cat doesn't love the string alone, try tying a piece of fan-folded paper (reused of course) to the end to mimic a butterfly or try tying on an old bead or jingle bell.

3. Try making the previously mentioned tinfoil balls. If your cat doesn't like a small ball, try adding tin foil on to make a larger one.

4. See if your kitty likes bat around old buttons or pom-poms.

5. Try sewing toy mice using old socks or fabric scraps. Add some cat nip to the stuffing for some extra play-time fun.

6. Kitties love to hide and to den in confined spaces. Keep a cardboard box or paper bag that is big enough for your cat to curl up in. You kitty will have a safe place to sleep and a place to hide and jump out of.

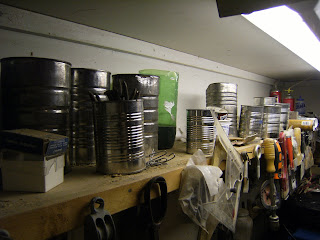
20 Reuses for Tin Cans


We all have them in our cupboard; the tin can. This innovation in food preservation not only allows a quick and easy food resources, but produces a lot of waste. With the amount of resources used to make a single tin can, why not give some of the cans you use an extended life before tossing them in the recycle bin.

1. Garage Organizer:


Tin cans can be used to organize your workbench. Sort nail, screws, and other hardware by size and type and size into tin cans. Also use tin cans to store tool like wrenches and screwdrivers.

2. Bathroom Organizer:

Use tin cans in the bathroom to as toothbrush holders or to hold makeup brushes and eyeliners. Tin cans can be wrapped in paper, wallpaper, or fabric or painted to match your decor.

3. Utensil Crock:


A large soup can or coffee can can be used in the kitchen as a utensil crock next to the stove. You can wrap the can in paper, wallpaper, or fabric or use it bare to match your decor. Try filling the can part way with beans, rice, or sand to prevent tipping.

4. Pen and Pencil Holder:

Use a soup sized can as a pen and pencil holder either at home or at the office. Tin cans can be used either bare; wrapped in decorative paper, wallpaper, or fabric; or painted. For the office, try wrapping the can with a paper featuring your company logo. At home, reuse paint or wallpaper to match your decor. Tin cans can also be filled with rice, beans, or sand to prevent tipping.

5. Vase:

Tin cans can be used as vases either at home or for special occasions like weddings. A decorated tin can filled with flowers can also make a special gift.

6. Flower Pot:

You can use any size can for a flower pot depending on the plant you are growing. Soup size cans are appropriate for small flowers, herbs, or cactus. For anything else select a medium size can or larger. Punch at least 3 holes in the bottom for drainage using a hammer and nail. Fill with potting soil and plant. If you like you can decorate your flower pot by painting it, covering it in fabric, glitter, ribbons, seashells or whatever you desire.

7. Drawer Organizer: Use small tin cans like tuna and cat food cans to organize an office drawer. Separate paper clips, rubber bands, thumb tacks, binder clips, and other office necessities into individual cans. Cans can secured to a reused piece of cardboard cut to fit the drawer.

8. Luminary:

Use tin cans as pretty luminaries for summer or for fall and winter holidays. Tin cans can be punched with nails to form whatever pattern you desire. Create flowers or geometric designs for a summer patio. Try stars and fireworks for a Fourth of July fest. Make jack-o-lanterns or spooky scenes for Halloween. Use snowflakes, stars, or messages of peace and joy for the Holiday season. Make a few luminaries to decorate or enough to line a driveway or walk. Find instructions for making your own luminaries here.

9. Organize Paint Brushes: Use a large soup can to store paint brushes in the art studio.

10. Ice Bucket: A coffee sized can makes an excellent ice bucket. Simply cut off the top and fill with ice. Your ice bucket can be decorated to match your decor.

11. Buddy Burner:


Buddy Burners are an emergency preparedness essential or a fun method to heat food while camping. Reuse a tuna or cat food can, cardboard, and old candle stubs to make this fun craft. Reuse a coffee size can to make a stove. Find instructions for making your own buddy burners here.

12. Remote Control Holder: Are you tired of always looking for the remote? Tin cans, in a soup can size or larger, can be used to hold the remote controls on your coffee table. Find a can that all of your remotes will fit in, decorate to match your decor, and leave it on the coffee table. Place the remote controls in the can and you will find them when you return.

13. Penny Bank: An excellent craft project for kids. Find instructions here.

14. Umbrella Stand: Take four #10 cans (coffee can size) and cut the ends off of three of them. Cut the top off of the fourth can. Hot glue the cans together end to end placing the fourth can on the bottom so the unopened end serves as a base. Cover the cans with fabric or paint them to match your decor. You may want to place a rock or other weight in the bottom to prevent tipping.

15. Bread Pan:


Cut both ends from a #10 can (coffee can size). Use your favorite bread dough recipe to make enough dough for one loaf of bread. Make sure the can is clean inside. Grease the inside of the can and place your bread dough it it for its second raising. Allow the dough to raise until double in size and then bake according to your recipe instructions. The can will create a round bread loaf. Or, for a tin can cake, click here.

16. First Aid/Emergency Kit:

Use an old Altoids or other small tin box and fill with band aids, small bottle of rubbing alcohol, cotton balls or swabs, matches, water purification tablets, or other items for an easily portable first aid/emergency kit. The tin box will keep the items inside dry and protected. Keep your first aid/emergency kit in your purse, glove box, or desk drawer.

17. Sewing Kit: Also using an Altoids or similar kit, fill with sewing needles, thread in various colors, pins, extra buttons, and safety pins for a purse, glove box, or travel sewing kit.

18. Slug and Snail traps:

Use a soup sized tin can to make slug and snail traps for your garden. Bury all but the top inch of the can in areas of your garden frequented by slugs and snails. Fill the can half full with beer. The slugs and snails will be attracted to the scent of the beer and crawl in and not be able to get out again. Once they are stuck, they will drown.

19. Christmas Ornaments: Using the lids from juice concentrate cans and biscuit cans; punch a design into the lid with a nail and hammer. Try stars, snowflakes, wreaths or Christmas's messages. Use different size nails for more intricate designs. You can also paint the lid for a fun, festive pop of color. Punch a large hole into the top and string a ribbon through for a hanger. Once the ornament is hung on the tree, the Christmas lights will shine through.

20. Tin Can Games: Tin can bowling, kick the can, tin can telephone,or whatever else you can dream up.