
We all have them in our cupboard; the tin can. This innovation in food preservation not only allows a quick and easy food resources, but produces a lot of waste. With the amount of resources used to make a single tin can, why not give some of the cans you use an extended life before tossing them in the recycle bin.
1. Garage Organizer:
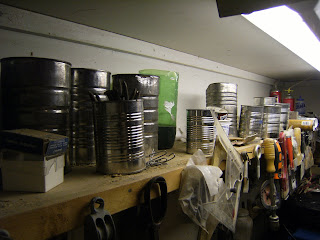
Tin cans can be used to organize your workbench. Sort nail, screws, and other hardware by size and type and size into tin cans. Also use tin cans to store tool like wrenches and screwdrivers.
2. Bathroom Organizer:
Use tin cans in the bathroom to as toothbrush holders or to hold makeup brushes and eyeliners. Tin cans can be wrapped in paper, wallpaper, or fabric or painted to match your decor.
3. Utensil Crock:
A large soup can or coffee can can be used in the kitchen as a utensil crock next to the stove. You can wrap the can in paper, wallpaper, or fabric or use it bare to match your decor. Try filling the can part way with beans, rice, or sand to prevent tipping.
4. Pen and Pencil Holder:
Use a soup sized can as a pen and pencil holder either at home or at the office. Tin cans can be used either bare; wrapped in decorative paper, wallpaper, or fabric; or painted. For the office, try wrapping the can with a paper featuring your company logo. At home, reuse paint or wallpaper to match your decor. Tin cans can also be filled with rice, beans, or sand to prevent tipping.
5. Vase:

Tin cans can be used as vases either at home or for special occasions like weddings. A decorated tin can filled with flowers can also make a special gift.
6. Flower Pot:
You can use any size can for a flower pot depending on the plant you are growing. Soup size cans are appropriate for small flowers, herbs, or cactus. For anything else select a medium size can or larger. Punch at least 3 holes in the bottom for drainage using a hammer and nail. Fill with potting soil and plant. If you like you can decorate your flower pot by painting it, covering it in fabric, glitter, ribbons, seashells or whatever you desire.
7. Drawer Organizer: Use small tin cans like tuna and cat food cans to organize an office drawer. Separate paper clips, rubber bands, thumb tacks, binder clips, and other office necessities into individual cans. Cans can secured to a reused piece of cardboard cut to fit the drawer.
8. Luminary:
Use tin cans as pretty luminaries for summer or for fall and winter holidays.
Tin cans can be punched with nails to form whatever pattern you desire. Create flowers or geometric designs for a summer patio. Try stars and fireworks for a Fourth of July fest. Make jack-o-lanterns or spooky scenes for Halloween. Use snowflakes, stars, or messages of peace and joy for the Holiday season. Make a few luminaries to decorate or enough to line a driveway or walk. Find instructions for making your own luminaries
here.
9. Organize Paint Brushes: Use a large soup can to store paint brushes in the art studio.
10. Ice Bucket: A coffee sized can makes an excellent ice bucket. Simply cut off the top and fill with ice. Your ice bucket can be decorated to match your decor.
11. Buddy Burner:
Buddy Burners are an emergency preparedness essential or a fun method to heat food while camping. Reuse a tuna or cat food can, cardboard, and old candle stubs to make this fun craft. Reuse a coffee size can to make a stove.
Find instructions for making your own buddy burners
here.
12. Remote Control Holder: Are you tired of always looking for the remote? Tin cans, in a soup can size or larger, can be used to hold the remote controls on your coffee table. Find a can that all of your remotes will fit in, decorate to match your decor, and leave it on the coffee table. Place the remote controls in the can and you will find them when you return.
13. Penny Bank: An excellent craft project for kids. Find instructions
here.
14. Umbrella Stand: Take four #10 cans (coffee can size) and cut the ends off of three of them. Cut the top off of the fourth can. Hot glue the cans together end to end placing the fourth can on the bottom so the unopened end serves as a base. Cover the cans with fabric or paint them to match your decor. You may want to place a rock or other weight in the bottom to prevent tipping.
15. Bread Pan:
Cut both ends from a #10 can (coffee can size). Use your favorite bread dough recipe to make enough dough for one loaf of bread. Make sure the can is clean inside. Grease the inside of the can and place your bread dough it it for its second raising. Allow the dough to raise until double in size and then bake according to your recipe instructions. The can will create a round bread loaf. Or, for a tin can cake, click
here.
16. First Aid/Emergency Kit:
Use an old Altoids or other small tin box and fill with band aids, small bottle of rubbing alcohol, cotton balls or swabs, matches, water purification tablets, or other items for an easily portable first aid/emergency kit. The tin box will keep the items inside dry and protected. Keep your first aid/emergency kit in your purse, glove box, or desk drawer.
17. Sewing Kit: Also using an Altoids or similar kit, fill with sewing needles, thread in various colors, pins, extra buttons, and safety pins for a purse, glove box, or travel sewing kit.
18. Slug and Snail traps:
Use a soup sized tin can to make slug and snail traps for your garden. Bury all but the top inch of the can in areas of your garden frequented by slugs and snails. Fill the can half full with beer. The slugs and snails will be attracted to the scent of the beer and crawl in and not be able to get out again. Once they are stuck, they will drown.
19. Christmas Ornaments: Using the lids from juice concentrate cans and biscuit cans; punch a design into the lid with a nail and hammer. Try stars, snowflakes, wreaths or Christmas's messages. Use different size nails for more intricate designs. You can also paint the lid for a fun, festive pop of color. Punch a large hole into the top and string a ribbon through for a hanger. Once the ornament is hung on the tree, the Christmas lights will shine through.
 What do you do with jeans that are too worn to wear? Faced with a couple pairs of jeans that were unwearable, but unwilling to just throw them away, I created a few fun new items. First, I used the top of a pair of my jeans, paired with a broken leather belt, to make a hobo style handbag for myself. I cut off the jeans just above the leg and sewed the bottom closed. I then cut off the bottom hem of the jeans and sewed them together to create a drawstring. I gathered the sides to shape the bag and added my belt that the buckle had broken off of for a strap. The front and back pockets have come in handy for my cell phone, car keys, and lipsticks.


